Creating Your First Plugin
Beta Feature
The plugin system is in beta (available in Beekeeper Studio 5.3+). Things might change, but we'd love your feedback!
Let's build a simple "Hello World" plugin! You'll create a new tab that shows "Hello World!" and learn how to interact with databases. Perfect for getting started! 🚀
What You Need
- Basic HTML, CSS, and JavaScript knowledge
- Node.js and npm/yarn installed
- Beekeeper Studio installed
Quick Start (3 Options)
Option 1: Vite Project ⭐ Recommended
Why Vite? Vite provides a nice development experience with Hot Module Replacement (HMR). When you make changes to your plugin code, you'll see updates reflected in Beekeeper Studio without needing to manually reload the plugin or restart the application. This helps streamline the development process.
Vite is also quite straightforward to configure. With a simple vite.config.ts and our official plugin, you get TypeScript support, modern JavaScript features, asset bundling, and production builds.
1. Create a Vite project
npm create vite@latest hello-world-plugin
cd hello-world-plugin
yarn create vite hello-world-plugin
cd hello-world-plugin
2. Install the Beekeeper Studio Vite plugin
npm install @beekeeperstudio/vite-plugin
yarn add @beekeeperstudio/vite-plugin
3. Create the manifest file
Create manifest.json to define your plugin:
{
    "id": "hello-world-plugin",
    "name": "Hello World Plugin",
    "author": {
        "name": "Your Name",
        "url": "https://yourwebsite.com"
    },
    "description": "My first awesome plugin!",
    "version": "1.0.0",
    "capabilities": {
        "views": [
            {
                "id": "hello-world-tab",
                "name": "Hello World",
                "type": "shell-tab",
                "entry": "dist/index.html"
            }
        ]
    }
}
4. Create/update vite.config.ts:
import { defineConfig } from 'vite'
import bks from '@beekeeperstudio/vite-plugin'

export default defineConfig({
  plugins: [bks()],
})
5. Link to Beekeeper Studio
Create a symbolic link so Beekeeper Studio can find your plugin:
ln -s $(pwd) ~/.config/beekeeper-studio/plugins/hello-world-plugin
ln -s $(pwd) "~/Library/Application Support/beekeeper-studio/plugins/hello-world-plugin"
mklink /D "%APPDATA%\beekeeper-studio\plugins\hello-world-plugin" "%CD%"
ln -s $(pwd) /path/to/beekeeper-studio/beekeeper-studio-data/plugins/hello-world-plugin
Why link instead of copying directly?
This keeps your code safe! If you accidentally uninstall the plugin, your source code won't be deleted.
6. Run development server
npm run dev
yarn dev
Now you have hot reload! Changes to your code will automatically update in Beekeeper Studio.
Option 2: Use the Starter Template (without Vite)
1. Clone our ready-to-go template
git clone https://github.com/beekeeper-studio/bks-plugin-starter.git hello-world-plugin
cd hello-world-plugin
2. Link it to Beekeeper Studio's plugins folder
ln -s $(pwd) ~/.config/beekeeper-studio/plugins/hello-world-plugin
ln -s $(pwd) "~/Library/Application Support/beekeeper-studio/plugins/hello-world-plugin"
mklink /D "%APPDATA%\beekeeper-studio\plugins\hello-world-plugin" "%CD%"
Why link instead of copying directly?
This keeps your code safe! If you accidentally uninstall the plugin, your source code won't be deleted.
Option 3: Build from Scratch
Want to understand every piece? Let's build it step by step:
Step 1: Create Your Plugin Folder
First, create a folder anywhere you like for your plugin:
mkdir hello-world-plugin
cd hello-world-plugin
Then link it to Beekeeper Studio's plugins directory:
ln -s $(pwd) ~/.config/beekeeper-studio/plugins/hello-world-plugin
ln -s $(pwd) "~/Library/Application Support/beekeeper-studio/plugins/hello-world-plugin"
mklink /D "%APPDATA%\beekeeper-studio\plugins\hello-world-plugin" "%CD%"
ln -s $(pwd) /path/to/beekeeper-studio/beekeeper-studio-data/plugins/hello-world-plugin
Why link instead of copying directly?
This keeps your code safe! If you accidentally uninstall the plugin, your source code won't be deleted.
Step 2: Create the Manifest
Create manifest.json - this tells Beekeeper Studio about your plugin:
{
    "id": "hello-world-plugin",
    "name": "Hello World Plugin",
    "author": {
        "name": "Your Name",
        "url": "https://yourwebsite.com"
    },
    "description": "My first awesome plugin!",
    "version": "1.0.0",
    "capabilities": {
        "views": [
            {
                "id": "hello-world-tab",
                "name": "Hello World",
                "type": "shell-tab",
                "entry": "index.html"
            }
        ]
    }
}
Step 3: Create the Interface
Create index.html - your plugin's main page:
<!DOCTYPE html>
<html lang="en">
<head>
<meta charset="UTF-8">
<meta name="viewport" content="width=device-width, initial-scale=1.0">
<title>Hello World Plugin</title>
<style>
* { box-sizing: border-box; }
body {
font-family: system-ui, -apple-system, sans-serif;
margin: 0;
padding: 2rem;
background: #f8f9fa;
color: #333;
}
.container {
max-width: 600px;
margin: 0 auto;
text-align: center;
}
h1 {
color: #2d3748;
margin-bottom: 1rem;
}
p {
color: #4a5568;
margin-bottom: 1.5rem;
}
button {
background: #3182ce;
color: white;
border: none;
padding: 0.75rem 1.5rem;
border-radius: 0.5rem;
cursor: pointer;
font-size: 1rem;
font-weight: 500;
}
button:hover { background: #2c5aa0; }
.tables {
margin-top: 1rem;
padding: 1rem;
background: #e6fffa;
border-radius: 0.5rem;
display: none;
}
.tables.show { display: block; }
</style>
</head>
<body>
<div class="container">
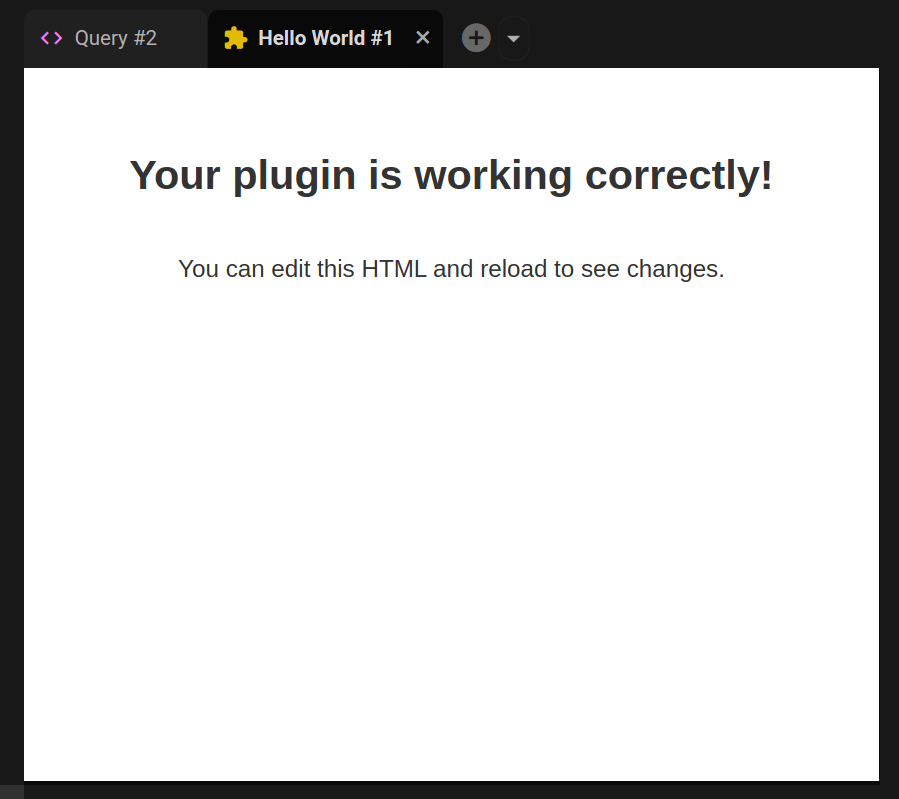
<h1>🎉 Your plugin works!</h1>
<p>Edit this HTML and reload to see changes.</p>
</div>
</body>
</html>
You should now have:
hello-world-plugin/
├── manifest.json
└── index.html
Test It Out! 🧪
For Vite Users
If you're using Vite, make sure your dev server is running first!
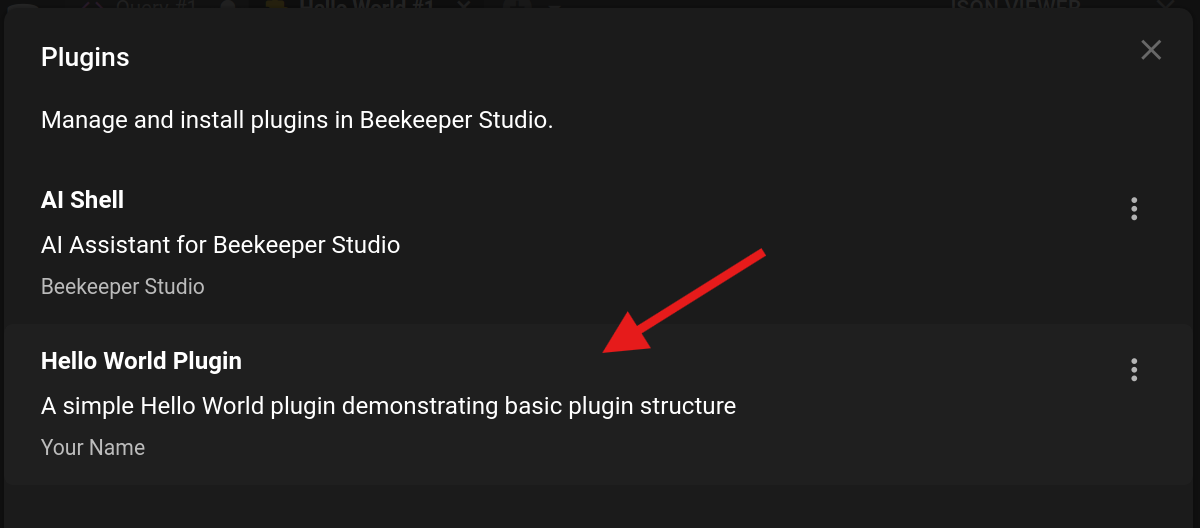
- Open Beekeeper Studio
- Go to Tools → Manage Plugins
-
Look for "Hello World Plugin" - if it's there, you're golden! ✨
-
Connect to any database
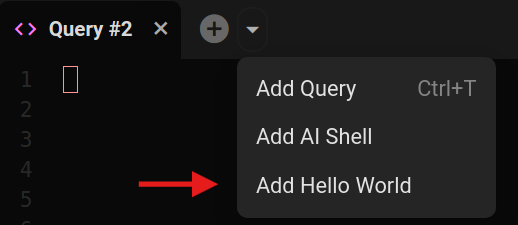
- Click the dropdown arrow next to the + button
- Select "Hello World" from the menu
- Boom! Your plugin opens in a new tab 🎯
Make It Interactive! 🎮
Let's add database interaction! First, install the plugin dependency:
npm install @beekeeperstudio/plugin
yarn add @beekeeperstudio/plugin
Create main.js:
// Essential: enables proper event handling
import "./node_modules/@beekeeperstudio/plugin/dist/eventForwarder.js";
import { getTables } from "./node_modules/@beekeeperstudio/plugin/dist/index.js";
async function showTables() {
try {
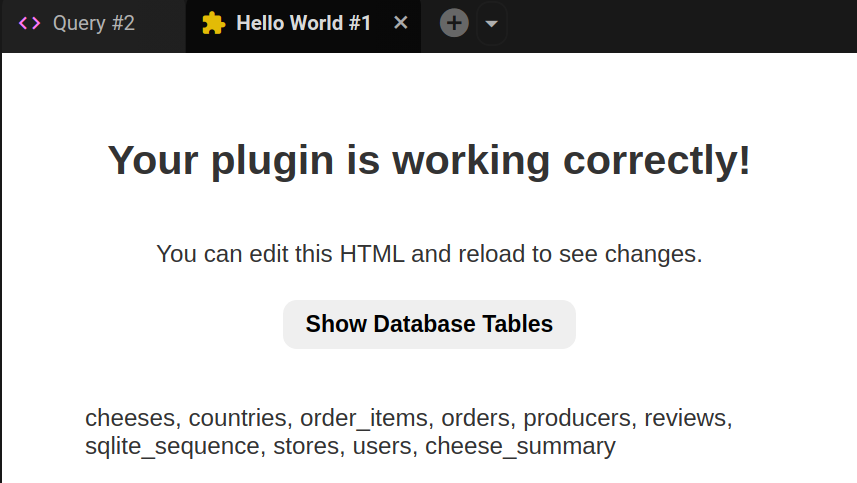
const tables = await getTables();
const tablesDiv = document.querySelector(".tables");
tablesDiv.innerHTML = `<strong>Tables:</strong> ${tables.map(t => t.name).join(", ")}`;
tablesDiv.classList.add("show");
} catch (error) {
console.error("Failed to get tables:", error);
}
}
document.addEventListener("DOMContentLoaded", () => {
document.querySelector("#show-tables-btn")?.addEventListener("click", showTables);
});
Update your HTML by adding this inside the container div (after the <p> tag):
<button id="show-tables-btn">Show Database Tables</button>
<div class="tables"></div>
<script type="module" src="main.js"></script>
Theme Sync (Optional) 🎨
Coming Soon!
Automatic theme syncing is planned. For now, here's how to do it manually.
Make your plugin match Beekeeper Studio's theme:
Add to your main.js:
import { addNotificationListener } from "./node_modules/@beekeeperstudio/plugin/dist/index.js";

// Sync with app theme
addNotificationListener("themeChanged", (args) => {
    const css = `:root { ${args.cssString} }`;
    let style = document.getElementById("bks-theme-style");

    if (style) {
        style.innerHTML = css;
    } else {
        style = document.createElement("style");
        style.id = "bks-theme-style";
        style.innerHTML = css;
        document.head.appendChild(style);
    }
});
Update your CSS to use theme variables:
body {
    background-color: var(--query-editor-bg, #f8f9fa);
    color: var(--text-dark, #333);
}

button {
    background-color: var(--theme-base, #3182ce);
    color: white;
}

.tables {
    background-color: var(--brand-success-light, #e6fffa);
}
The fallback values (after the comma) ensure your plugin works even before theme sync is initialized.
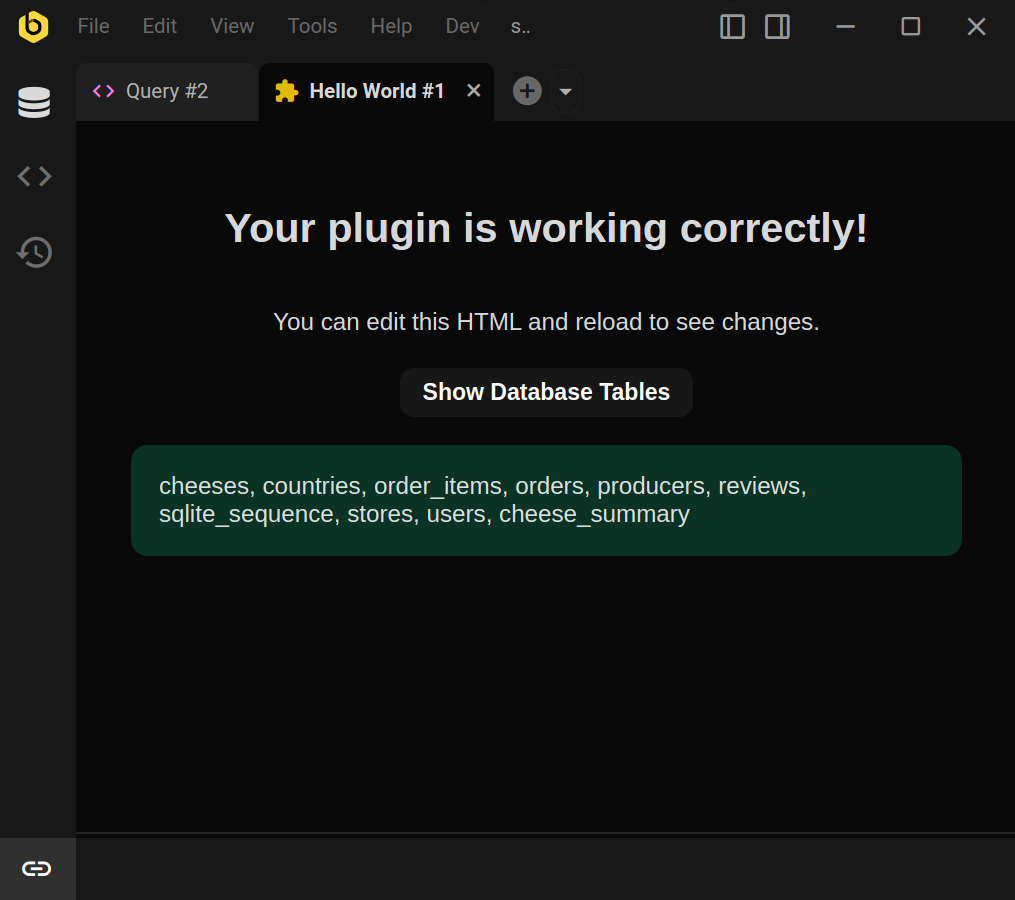
Final Result 🎉
Your complete index.html:
<!DOCTYPE html>
<html lang="en">
<head>
    <meta charset="UTF-8">
    <meta name="viewport" content="width=device-width, initial-scale=1.0">
    <title>Hello World Plugin</title>
    <style>
        * { box-sizing: border-box; }
        body {
            font-family: system-ui, -apple-system, sans-serif;
            margin: 0;
            padding: 2rem;
            background-color: var(--query-editor-bg, #f8f9fa);
            color: var(--text-dark, #333);
        }
        .container {
            max-width: 600px;
            margin: 0 auto;
            text-align: center;
        }
        h1 {
            color: #2d3748;
            margin-bottom: 1rem;
        }
        p {
            color: #4a5568;
            margin-bottom: 1.5rem;
        }
        button {
            background: var(--theme-base, #3182ce);
            color: white;
            border: none;
            padding: 0.75rem 1.5rem;
            border-radius: 0.5rem;
            cursor: pointer;
            font-size: 1rem;
            font-weight: 500;
        }
        button:hover { opacity: 0.9; }
        .tables {
            margin-top: 1rem;
            padding: 1rem;
            background: var(--brand-success-light, #e6fffa);
            border-radius: 0.5rem;
            display: none;
        }
        .tables.show { display: block; }
    </style>
</head>
<body>
    <div class="container">
        <h1>🎉 Your plugin works!</h1>
        <p>Edit this HTML and reload to see changes.</p>

        <button id="show-tables-btn">Show Database Tables</button>
        <div class="tables"></div>

        <script type="module" src="main.js"></script>
    </div>
</body>
</html>
Your complete main.js:
// Essential imports
import "./node_modules/@beekeeperstudio/plugin/dist/eventForwarder.js";
import {
    getTables,
    addNotificationListener,
} from "./node_modules/@beekeeperstudio/plugin/dist/index.js";

// Show database tables
async function showTables() {
    try {
        const tables = await getTables();
        const tablesDiv = document.querySelector(".tables");
        tablesDiv.innerHTML = `<strong>Tables:</strong> ${tables.map(t => t.name).join(", ")}`;
        tablesDiv.classList.add("show");
    } catch (error) {
        console.error("Failed to get tables:", error);
    }
}

// Theme sync
addNotificationListener("themeChanged", (args) => {
    const css = `:root { ${args.cssString} }`;
    let style = document.getElementById("bks-theme-style");

    if (style) {
        style.innerHTML = css;
    } else {
        style = document.createElement("style");
        style.id = "bks-theme-style";
        style.innerHTML = css;
        document.head.appendChild(style);
    }
});

// Initialize
document.addEventListener("DOMContentLoaded", () => {
    document.querySelector("#show-tables-btn")?.addEventListener("click", showTables);
});
What's Next? 🚀
- Plugin API Reference - Explore all available functions
- Publishing Plugins - Share your creation with the world!